Atlas Sound FC-8ST handleiding
Handleiding
Je bekijkt pagina 33 van 43
AtlasIED.com
TELEPHONE: (800) 876-3333
SUPPORT@ATLASIED.COM
1601 JACK MCKAY BLVD.
ENNIS, TEXAS 75119 U.S.A.
INSTALLATION GUIDE
ISOFLARE™ PREMIUM LOUDSPEAKERS
FC SERIES
33
PRE-INSTALL - INSTALLATION (CONTINUED)
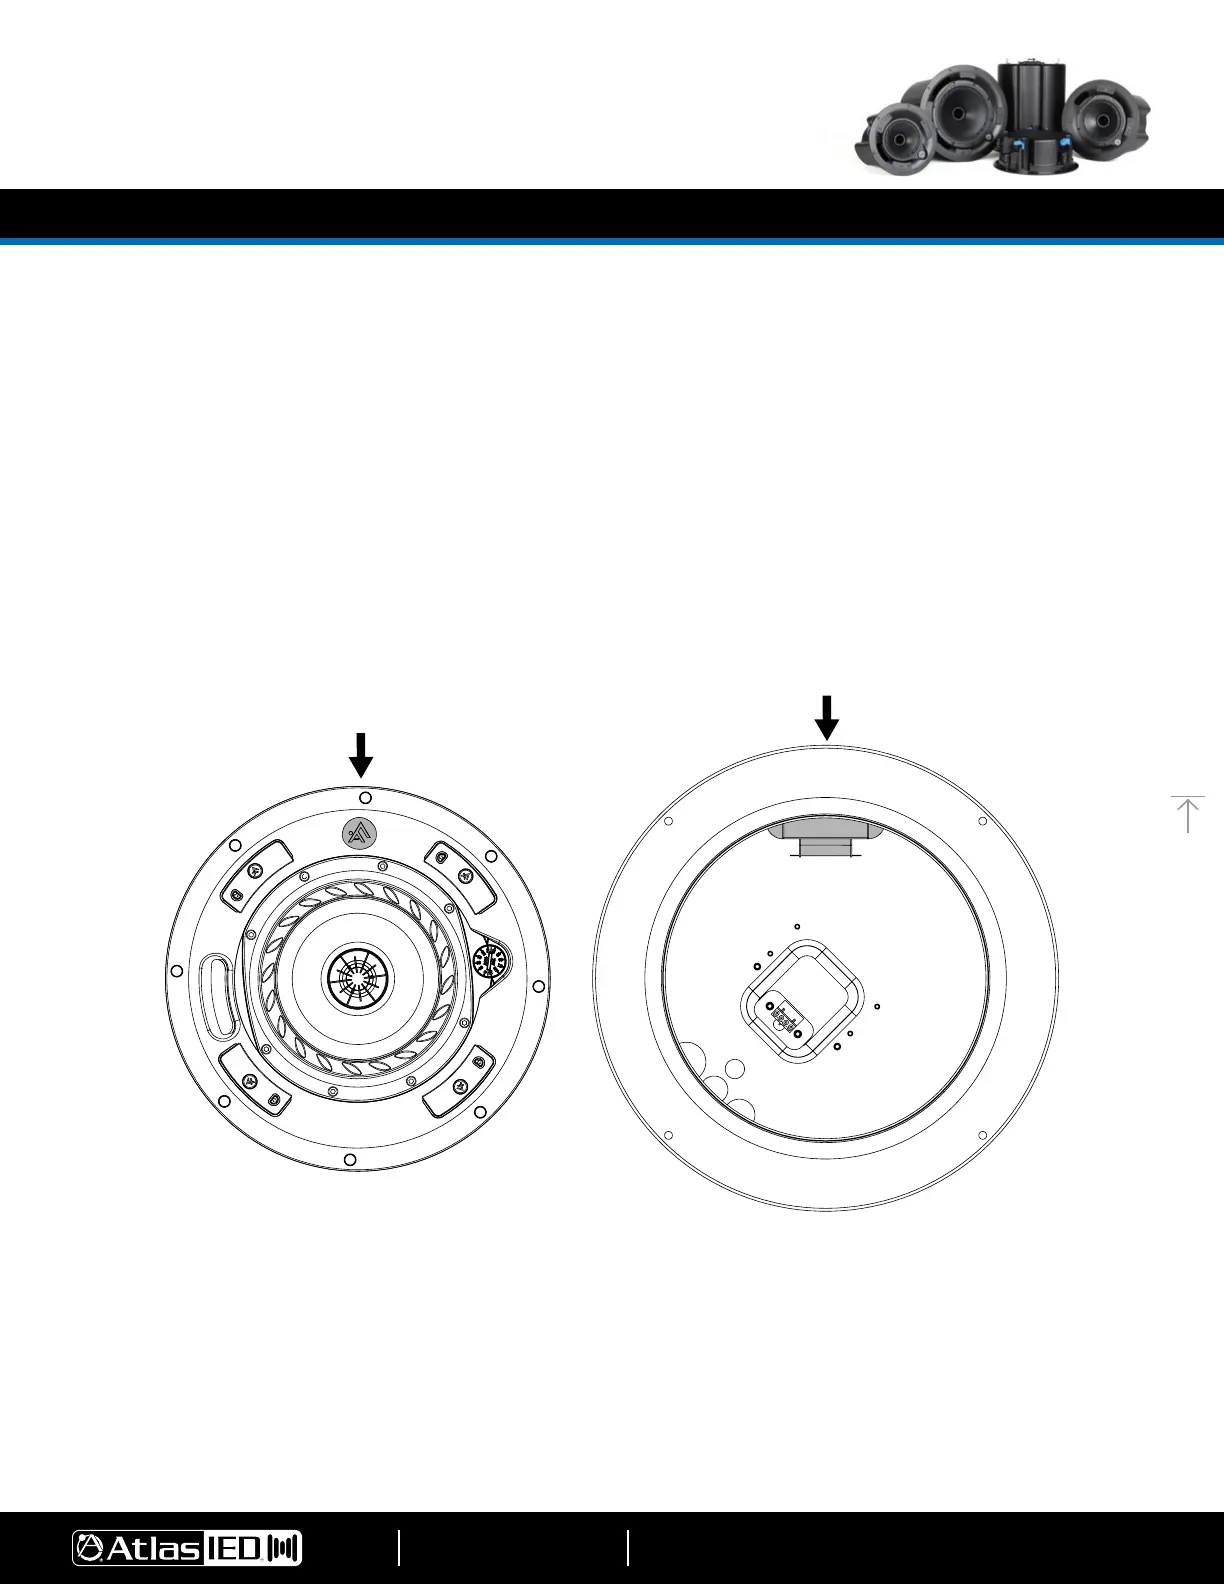
Figure 44
Step 7 – Install driver assembly into the back can
AligntheAtlas+Fynelogoonthebafetothetransformerinthebackcan.Thiswillensurethereisnointerference(Figure44).
Ensure that the mounting doglegs are in their default nested position and insert the loudspeaker through the hole in the ceiling and into the back can (Figure 45).
Secure the loudspeaker in place by pulling the T-handles to tighten the doglegs:
a. DisengagerstT-handlefromdefaultinstalledposition(Figure46).
b. PullT-handledownrmlyinasmoothcontinuousmotionuntilthedoglegengagestheC-ringandceiling(Figure47).Pullhandletighttolockinplace.
c. Push the “T-handle” upwards and align with the locking tab on the handle, placing it back to its default starting position (Figure 48).
d. Repeat steps A - C above for all remaining T-Handles.
Note 1: The FC 6" model has a maximum clamping distance of 2.0". For installation surfaces thicker than 1.5" remove the reusable black rubber boot from each
dogleg clamp prior to inserting the enclosure through the front of the tile/drywall.
Note 2: The FC 8" model has a maximum clamping distance of 1.7". For installation surfaces thicker than 1.17" remove the reusable black rubber boot from each dog-
leg clamp prior to inserting the enclosure through the front of the tile/drywall.
(Step 7 continues on next page)
Bekijk gratis de handleiding van Atlas Sound FC-8ST, stel vragen en lees de antwoorden op veelvoorkomende problemen, of gebruik onze assistent om sneller informatie in de handleiding te vinden of uitleg te krijgen over specifieke functies.
Productinformatie
| Merk | Atlas Sound |
| Model | FC-8ST |
| Categorie | Niet gecategoriseerd |
| Taal | Nederlands |
| Grootte | 9255 MB |


