ATen CL1000 handleiding
Handleiding
Je bekijkt pagina 14 van 42
CL1000 User Manual
4
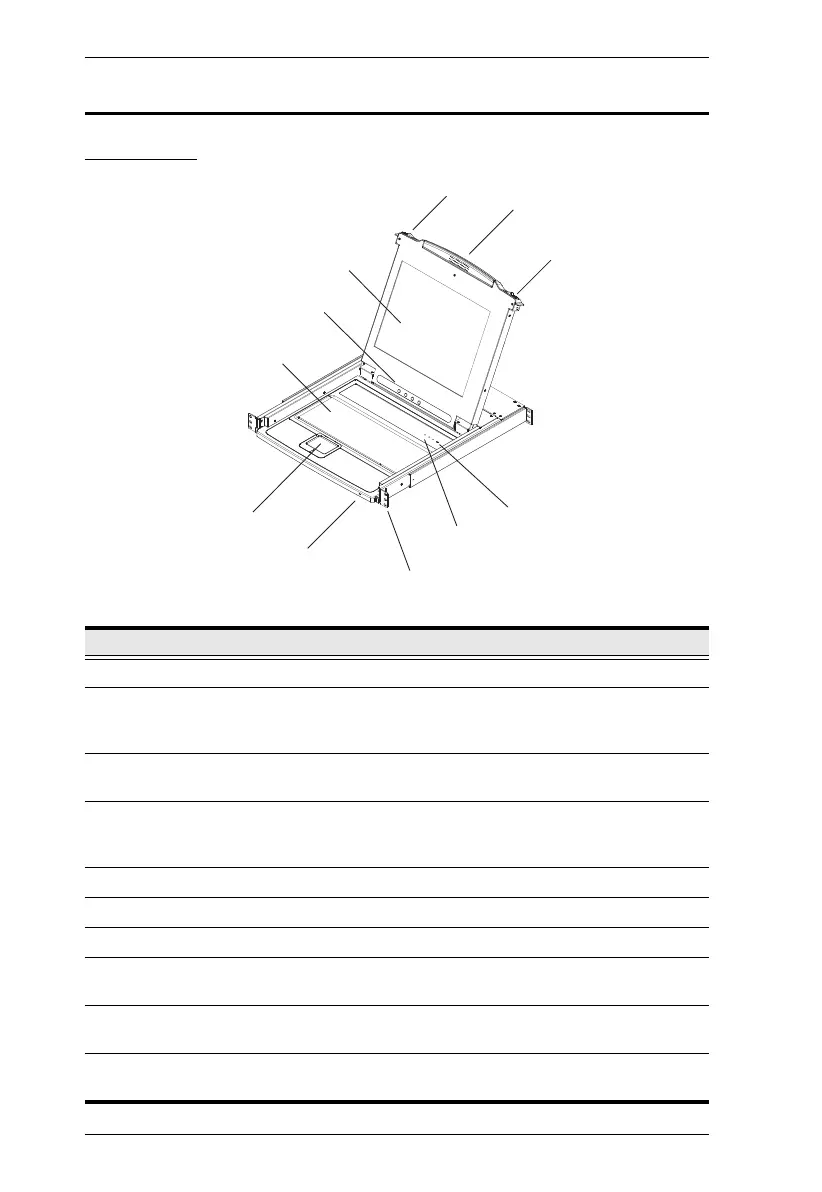
Components
Front View
No. Component Description
1 Handle Pull to slide the KVM module out; push to slide the module in.
2 Slide Release In order to slide the console out, you must first release it by
moving this tab sideways. See page 11 for details on sliding
the console in and out.
3 LCD Display After sliding the KVM module out, flip up the cover to access
the LCD monitor.
4 LCD Controls The LCD On/Off switch is located here, as well as buttons to
control the position and picture settings of the LCD display.
See page 14, for details.
5 Keyboard
6 Touchpad
7 Power LED Lights dark green to indicate that the unit is receiving power.
8 Rack Mounting
Brackets
The rack mounting brackets located at each corner of the unit
secure the chassis to a system rack.
9 Lock LEDs The Num Lock, Caps Lock, Scroll Lock LEDs are located
here.
10 Reset Switch Located to the right of the Lock LEDs. Press this recessed
switch in with a thin object to perform a system reset.
5
9
8
10
3
4
2
2
1
6
7
Bekijk gratis de handleiding van ATen CL1000, stel vragen en lees de antwoorden op veelvoorkomende problemen, of gebruik onze assistent om sneller informatie in de handleiding te vinden of uitleg te krijgen over specifieke functies.
Productinformatie
| Merk | ATen |
| Model | CL1000 |
| Categorie | Niet gecategoriseerd |
| Taal | Nederlands |
| Grootte | 2735 MB |


