Handleiding
Je bekijkt pagina 17 van 37
2-4 Chapter 2: Setup
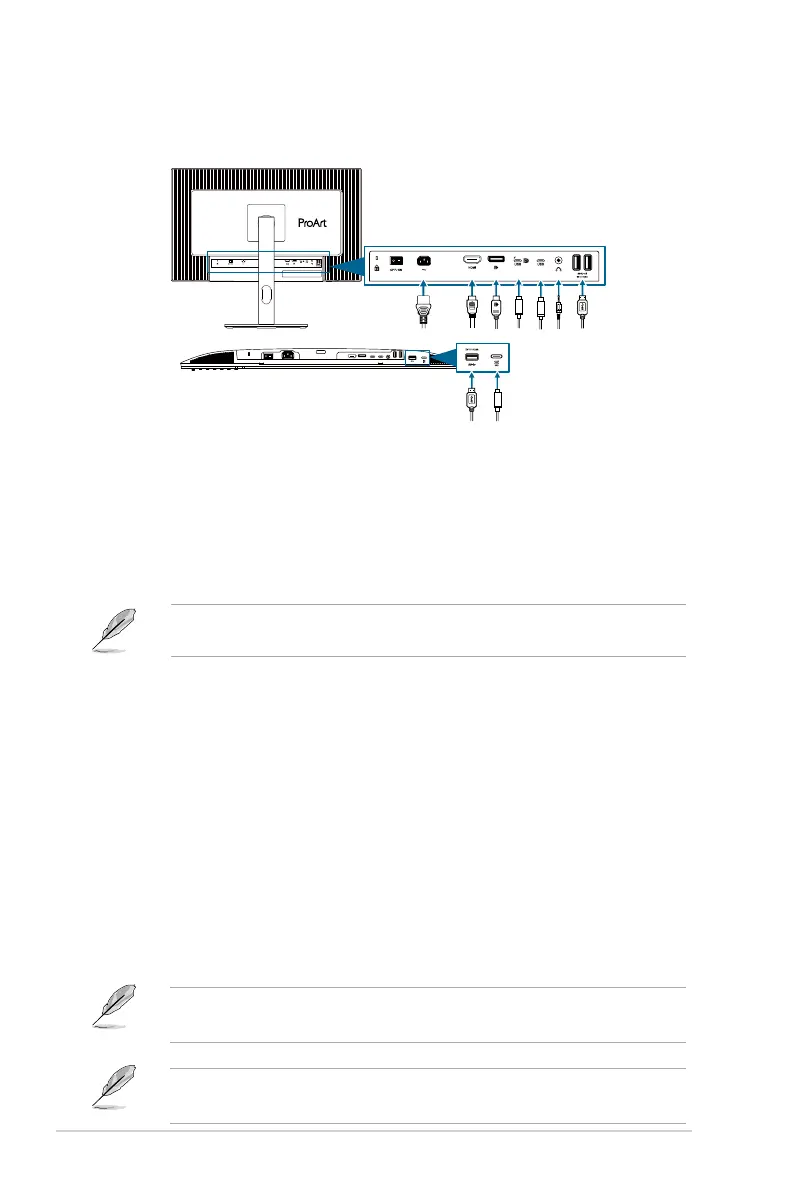
2.4 Connecting the cables
Connect the cables as the following instructions:
96W
96W
• To connect the power cord: Connect one end of the power cord
securely to the monitor’s AC input port, the other end to a power outlet.
• To connect the HDMI/DisplayPort/USB Type-C* cable:
a. Plug one end of the HDMI/DisplayPort/USB Type-C* cable to the
monitor’s HDMI/DisplayPort/USB Type-C jack.
b. Connect the other end of the HDMI/DisplayPort/USB Type-C* cable to
your device’s HDMI/DisplayPort/USB Type-C jack.
It is suggested to use USB ceried Type-C cable. If the signal source supports
DP Alt mode, all video, audio and data signal can be transmitted.
• To use the earphone: connect the end with plug type to the monitor’s
earphone jack when an HDMI/DisplayPort/USB Type-C signal is fed.
• To use the USB 3.2 Gen 1 ports:
»
Upstream: Use an USB Type-C cable and plug on end of the Type-C
connector to the monitor's USB Type-C port as upstream and the other
end to your computer's USB Type-C jack. Or use an USB Type-C to
Type-A cable and plug the Type-C connector to the the monitor's USB
Type-C as upstream and the Type-A connector to your computer's USB
Type-A jack. Make sure your computer is installed with the Windows,
macOS operating system. That will enable the USB ports on the monitor
to work.
»
Downstream: Use an USB cable to connect your device with the
monitor's USB Type-A jack.
When these cables are connected, you can choose the desired signal
from the
Signal
item in the OSD menu.
If you need to replace the power cord or the connection cable(s),
please contact ASUS customer service.
Bekijk gratis de handleiding van Asus ProArt PA27JCV, stel vragen en lees de antwoorden op veelvoorkomende problemen, of gebruik onze assistent om sneller informatie in de handleiding te vinden of uitleg te krijgen over specifieke functies.
Productinformatie
| Merk | Asus |
| Model | ProArt PA27JCV |
| Categorie | Monitor |
| Taal | Nederlands |
| Grootte | 2922 MB |


