Asus P3-PH4C handleiding
Handleiding
Je bekijkt pagina 22 van 92
2-6 Chapter 2: Basic installation
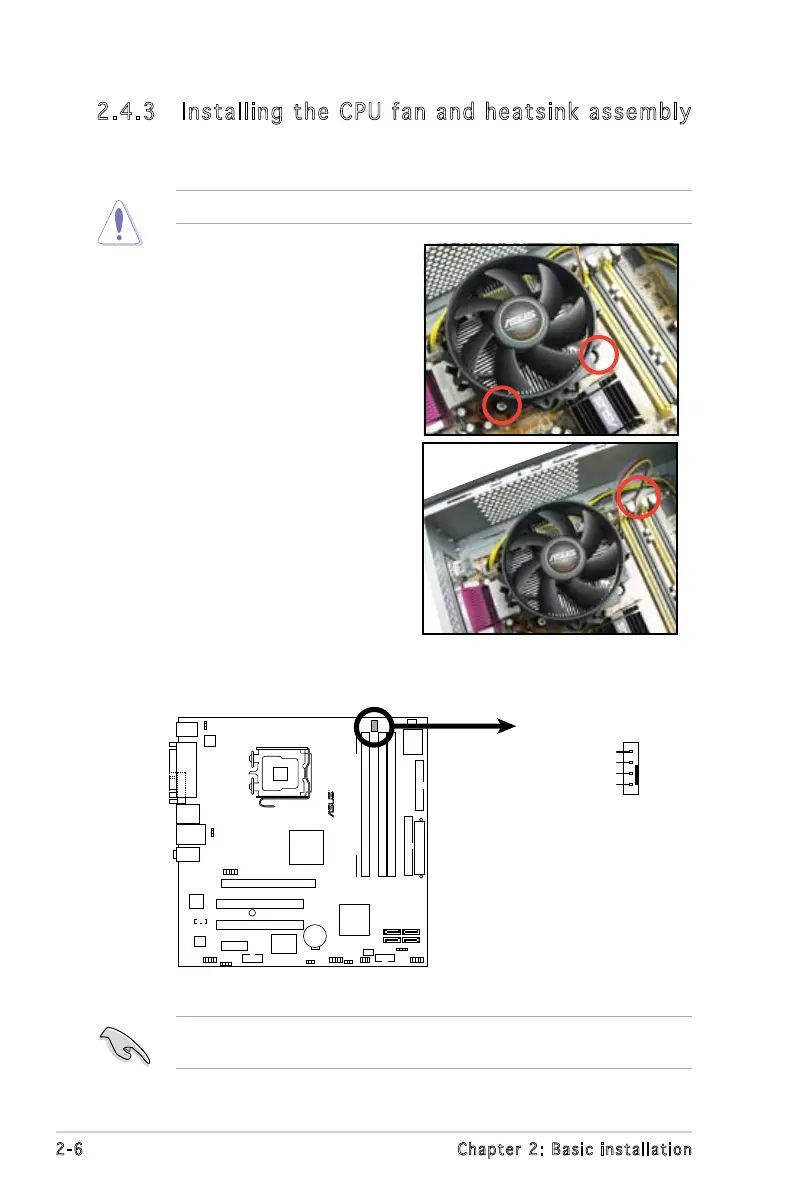
2.4.3 Installing the CPU fan and heatsink assembly
The system package includes a proprietary CPU fan and heatsink assembly
to ensure optimum thermal condition and performance.
DO NOT replace the proprietary CPU fan and heatsink with other models!
Refer to the gure below for the location of the CPU fan connector on
the motherboard.
Do not forget to connect the CPU fan connector! Hardware monitoring
errors can occur if you fail to plug this connector.
R
CPU Fan Connector
CPU_FAN
GND
CPU FAN PWR
CPU FAN IN
CPU FAN PWM
To install the CPU fan and heatsink
assembly:
1. Place the heatsink on top of the
installed CPU.
2. Drive four screws into the fan
holes to secure the fan to the
motherboard.
3. Connect the CPU fan cable.
Bekijk gratis de handleiding van Asus P3-PH4C, stel vragen en lees de antwoorden op veelvoorkomende problemen, of gebruik onze assistent om sneller informatie in de handleiding te vinden of uitleg te krijgen over specifieke functies.
Productinformatie
| Merk | Asus |
| Model | P3-PH4C |
| Categorie | Niet gecategoriseerd |
| Taal | Nederlands |
| Grootte | 13750 MB |
Caratteristiche Prodotto
| Kleur van het product | Zwart |
| Breedte | 95 mm |
| Diepte | 398 mm |
| Hoogte | 357 mm |
| Ethernet LAN | Ja |


