Asus J6412P-IM-AA handleiding
Handleiding
Je bekijkt pagina 31 van 86
Single Board Computer
31
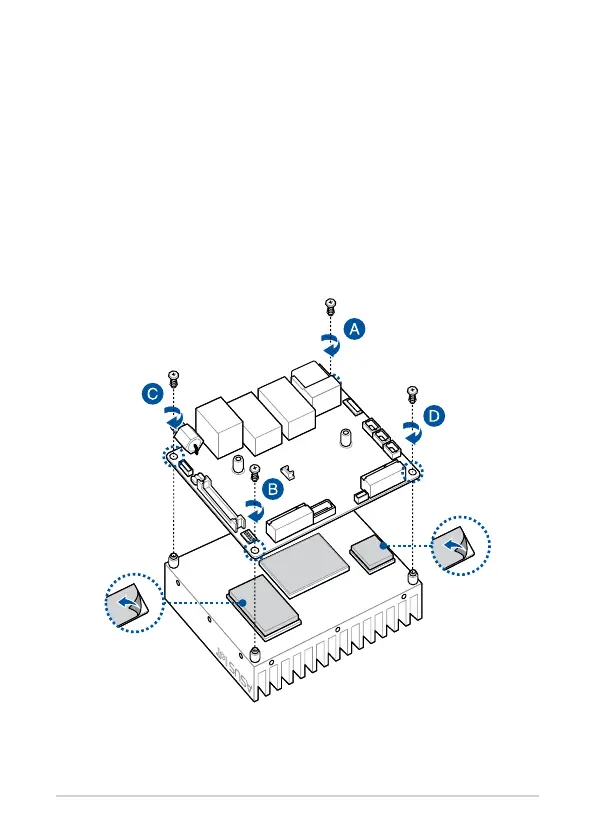
3.3 Installing a heatsink
1. Place the heatsink with its ns faced down on a at surface.
2. Remove the plastic lm on the thermal pads.
3. Orient the motherboard so that the CPU, chipset, and eMMC on its
backside are in direct contact with the copper pad on the heatsink, and
the four (4) screw holes on the motherboard are aligned to the four (4)
standos on the heatsink as shown below.
4. Secure the motherboard to the heatsink using the four (4) spring
screws bundled with the heatsink in the sequence shown below.
Bekijk gratis de handleiding van Asus J6412P-IM-AA, stel vragen en lees de antwoorden op veelvoorkomende problemen, of gebruik onze assistent om sneller informatie in de handleiding te vinden of uitleg te krijgen over specifieke functies.
Productinformatie
| Merk | Asus |
| Model | J6412P-IM-AA |
| Categorie | Niet gecategoriseerd |
| Taal | Nederlands |
| Grootte | 4638 MB |


