Handleiding
Je bekijkt pagina 60 van 66
EN - 16
finish time using the “+” and “-” buttons
while the timer is in this position. When
you have completed the adjustment, wait
until the current time of day and “>|” remain
illuminated on the Timer display.
The oven will calculate the operating time
by deducting the cooking period from
the set finishing time, at which it will stop
operating. The timer will give an audible
warning and “AUTO” will continue to flash.
Press any timer button to stop the warning
sound, and press the “+” and “-” buttons
simultaneously to exit “AUTO” mode.
The cooking end time cannot be set
when the grill functions are activated. If
the cooking end time was set before
activating the grill functions, the cooking
end time will be canceled after the grill
functions are selected.
Digital Timer Sound Adjustment
Press and hold the “-” sensor button until
you hear an audible 'beep' sound. After
this, each time the “-” button is pressed, a
different 'beep' tone will sound. There are
three different types of sound. Select the
desired tone and do not press any other
buttons. After a short time, the selected
warning sound will be saved.
Key Lock Function
The key lock is used to avoid unintentional
changes being made to the oven settings.
Press and hold the “+” button until you see
the key lock symbol on the display screen.
To deactivate the key lock, press and hold
the “+” button until the key lock symbol
disappears from the display.
While the key lock is active, only the power
button will be usable, all other buttons will
remain locked.
If there is no oven activity for 6 hours
while the oven is operating, the oven will
automatically switch off.
4.4 aCCeSSorieS
The EasyFix Wire Rack
Clean the accessories thoroughly with
warm water, detergent and a soft clean
cloth on first use.
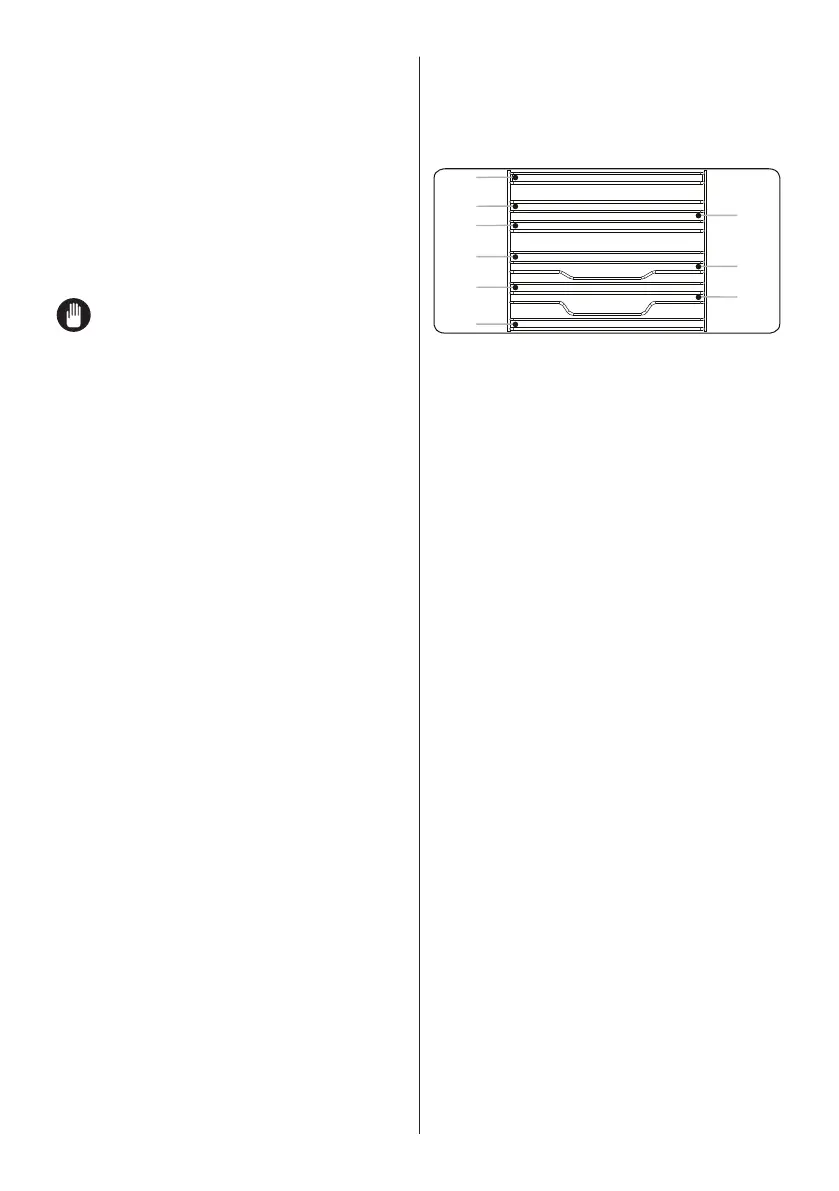
7
5
6
4
3
2
1
T2
T1
• Insert the accessory to the correct
position inside the oven.
• Allow at least a 1 cm space between the
fan cover and accessories.
• Take care removing cookware and/or
accessories out of the oven. Hot meals
or accessories can cause burns.
• The accessories may deform with heat.
Once they have cooled down, they will
recover their original appearance and
performance.
• Trays and wire grids can be positioned
on any level from of 1 to 7.
• Telescopic rail can be positioned on
levels T1, T2, 3, 4, 5, 6, 7.
• Level 3 is recommended for single level
cooking.
• Level T2 is recommended for single
level cooking with the telescopic rails.
• Level 2 and Level 4 are recommended
for double level cooking.
• The turnspit wire grid must be
positioned on Level 3.
• Level T2 is used for turnspit wire grid
positioning with the telescopic rails.
****Accessories may vary depending on the
model purchased.
Bekijk gratis de handleiding van Aspes AHM10800DCCB, stel vragen en lees de antwoorden op veelvoorkomende problemen, of gebruik onze assistent om sneller informatie in de handleiding te vinden of uitleg te krijgen over specifieke functies.
Productinformatie
| Merk | Aspes |
| Model | AHM10800DCCB |
| Categorie | Oven |
| Taal | Nederlands |
| Grootte | 6193 MB |


