Arecont Vision MegaView 2 AV2226PMTIR-S handleiding
Handleiding
Je bekijkt pagina 12 van 33
Arecont Vision MegaView
®
2 Installation Manual
Page | 12 support@arecontvision.com
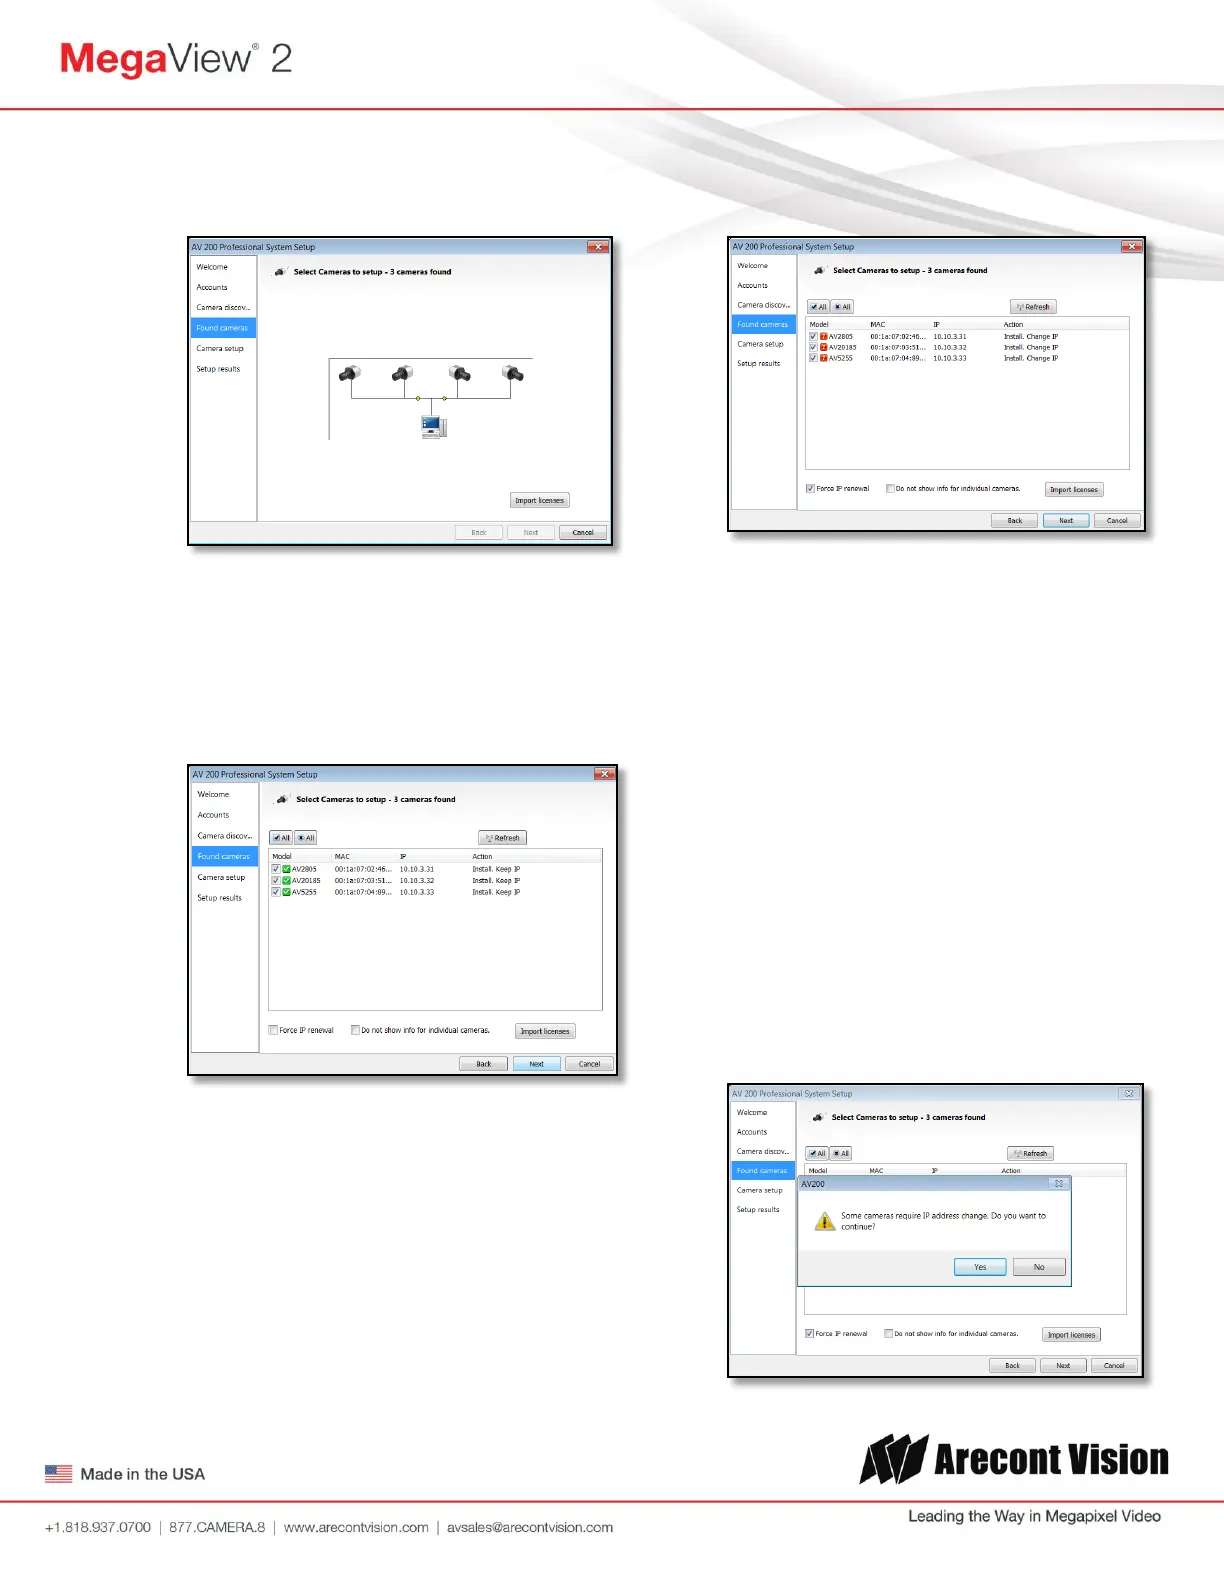
Click “OK” and then next to proceed to
discovery.
When the discovery process ends, a list of
cameras found on the network will be
displayed.
The camera model, MAC address, current
IP address and status of the camera will be
displayed in the list.
If the current IP address assigned to the
camera is incompatible with the subnet the
computer running AV200 is assigned to; a
warning icon will be displayed next to the
camera title and the Action message will
display signifying the camera as
inaccessible.
No camera IP addresses are changed at
this stage. To apply an IP change to all
selected cameras check the radio button
labeled Force IP renewal.
If changes are made to the address, the
screen will be followed by an individual
confirmation of the IP address change and
the title of each camera found on the
network.
Individual confirmation screens for each
camera can be skipped, but the software
will change the IP addresses of each
camera found without confirmation.
To change all the addresses and skip to the
end of the set up process, check the radio
button called do not show info for individual
cameras.
Click next and receive a pop-up
confirmation window warning that camera IP
addresses will be changed.
Bekijk gratis de handleiding van Arecont Vision MegaView 2 AV2226PMTIR-S, stel vragen en lees de antwoorden op veelvoorkomende problemen, of gebruik onze assistent om sneller informatie in de handleiding te vinden of uitleg te krijgen over specifieke functies.
Productinformatie
| Merk | Arecont Vision |
| Model | MegaView 2 AV2226PMTIR-S |
| Categorie | Bewakingscamera |
| Taal | Nederlands |
| Grootte | 14413 MB |