Arecont Vision ConteraIP Omni LX AV8476DN-28 handleiding
Handleiding
Je bekijkt pagina 13 van 56
Page 12 of 54
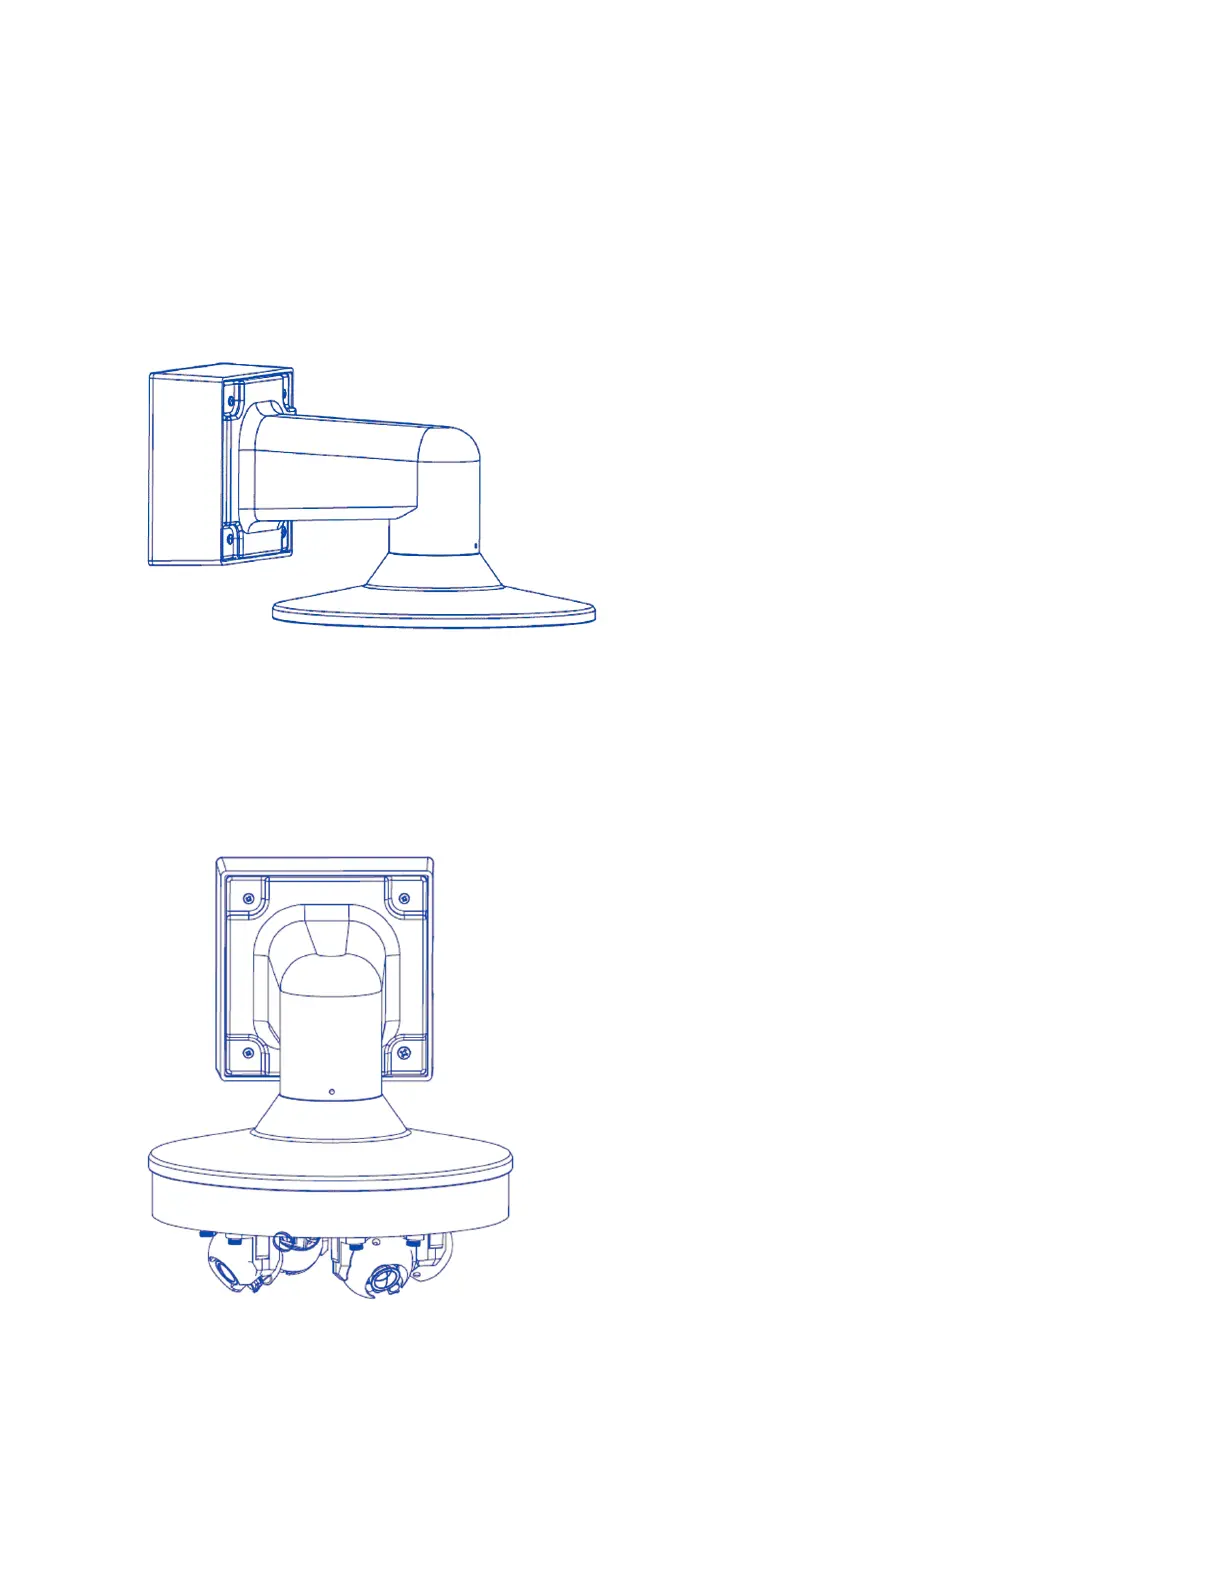
Wall Mount
For a proper wall mount installation, the AV-WMJB-W wall mount and SO-CAP-W wall mount cap are
required (sold separately). A wall mount should only be attached onto hard ceilings including wood,
plastic, metal, and concrete.
1. Using the Mounting template, prepare the mounting provisions for the camera installation.
2. Connect wall mount cap and wall mount as shown in Figure 1.
Figure 1: Attach wall mount cap to the wall mount
NOTE: The thread size for Top shield, pendant pole and mount is 1.5” NPT.
3. Run Ethernet Cable and outside power cable (if necessary) through the supplied rubber gasket
and then through the wall mount. Ensure the gasket is seated properly.
4. Attach the wall mount to the wall using drywall screws or any optional hardware suitable for the
mounting surface.
Figure 2: Attach the camera to the SO-CAP-W with the supplied screws
5. To configure the camera, reference the camera discovery, set-up and configuration section.
Bekijk gratis de handleiding van Arecont Vision ConteraIP Omni LX AV8476DN-28, stel vragen en lees de antwoorden op veelvoorkomende problemen, of gebruik onze assistent om sneller informatie in de handleiding te vinden of uitleg te krijgen over specifieke functies.
Productinformatie
| Merk | Arecont Vision |
| Model | ConteraIP Omni LX AV8476DN-28 |
| Categorie | Bewakingscamera |
| Taal | Nederlands |
| Grootte | 9391 MB |