Aquasure Harmony Lite AS-HL34A handleiding
Handleiding
Je bekijkt pagina 11 van 36
11
AQUASURE HARMONY SERIES
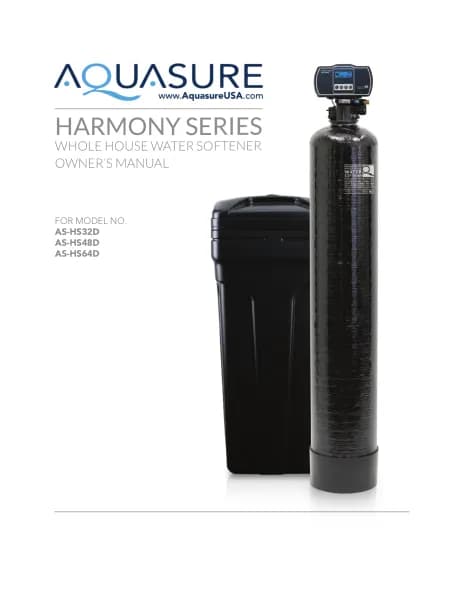
STEP 2. Mounting the Control Valve
2. Unscrew and remove the black shipping cap and
lubricate the riser tube located on the opening
of the tank. Make sure riser tube is ush with
the top of the tank.
1. Make sure the o-rings are lubricated before
installing. Lubricate both O-rings on the bottom
of the control valve (inner and outer).
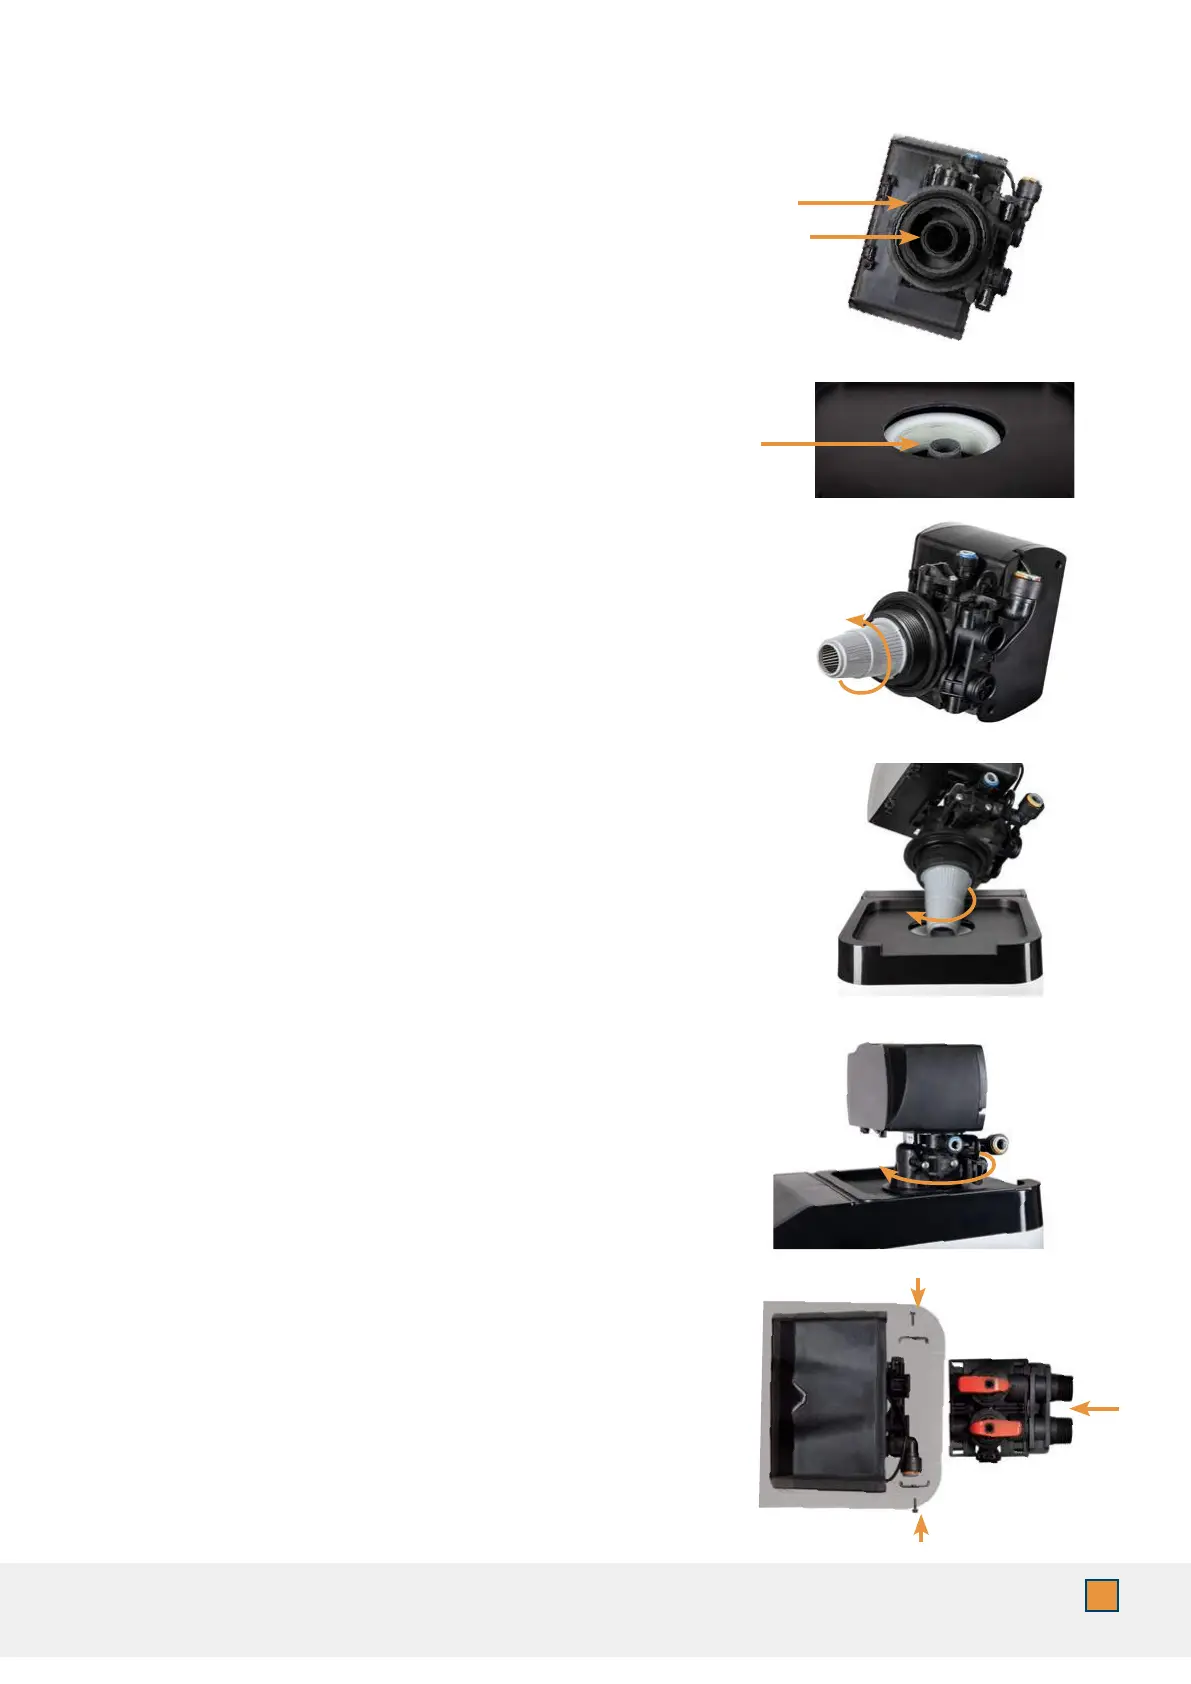
5. Tighten the valve hand tight, then snug it
further by tapping it with the palm of the hand.
Rotate the Tank so the control head is facing the
front and the pipe connection is in the back.
DO NOT use tools to tighten the valve or
damage could occur.
3. Install the upper basket on the bottom of the
valve by lining up the tabs, pressing in, then
turning the basket counterclockwise to lock it
in place.
6. Attach the bypass valve onto the control head and
secure it with the metal plates, placing screws in
the hole closest to the control head. Make sure
the o-rings are lubricated before connecting.
(Silicone Grease recommended as lubricant.)
4. Place the upper basket over the distributor tube
and push the valve on the tank. Thread the valve
on the tank by turning it clockwise. Be sure not
to cross-thread the valve on the tank. The valve
should thread easily in the tank. If not, it may be
cross-threaded.
DO NOT LUBRICATE as you may over-tighten
the valve.
Bekijk gratis de handleiding van Aquasure Harmony Lite AS-HL34A, stel vragen en lees de antwoorden op veelvoorkomende problemen, of gebruik onze assistent om sneller informatie in de handleiding te vinden of uitleg te krijgen over specifieke functies.
Productinformatie
| Merk | Aquasure |
| Model | Harmony Lite AS-HL34A |
| Categorie | Niet gecategoriseerd |
| Taal | Nederlands |
| Grootte | 6979 MB |