Handleiding
Je bekijkt pagina 58 van 98
14. Lift the Type-C bracket off the system board.
15.Disconnect the power-adapter port-cable from the system board.
16.Peel the power-adapter port-cable from the system board.
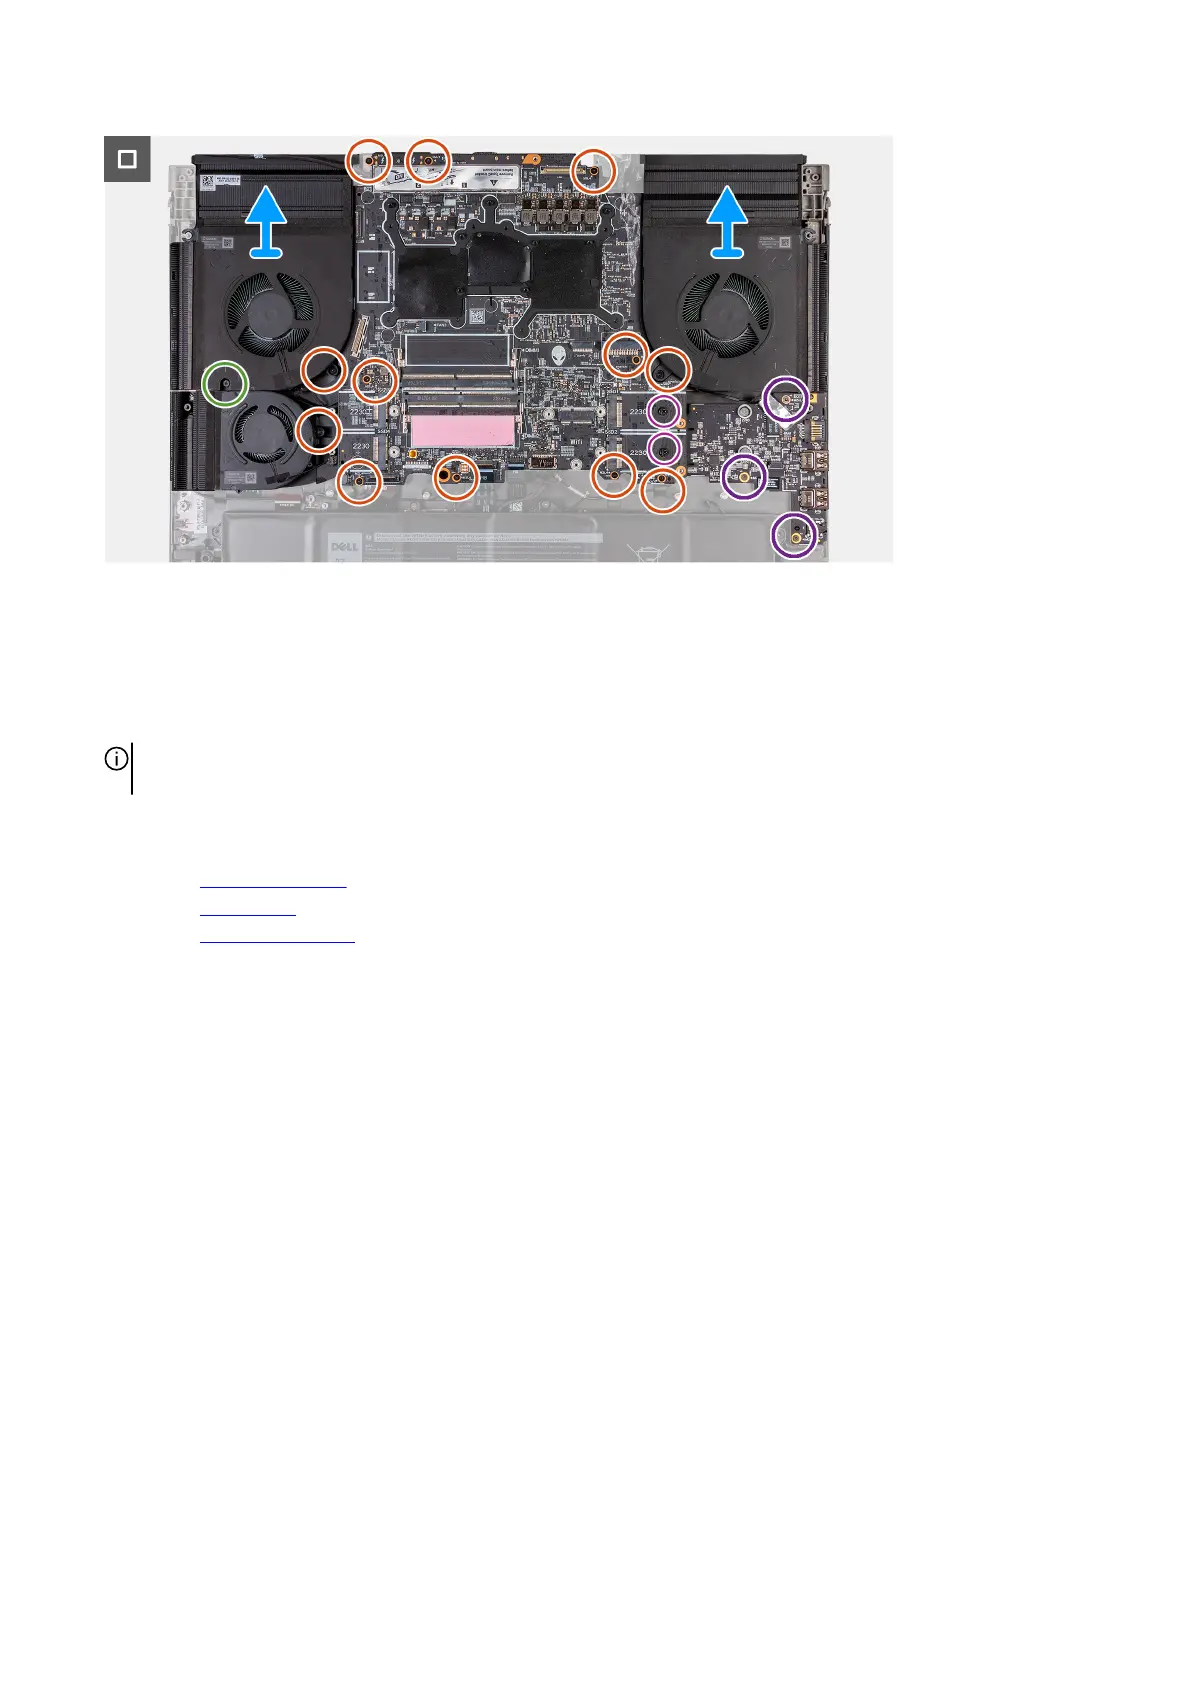
17. Remove the three screws (M2x3) that secure the audio board to the palm-rest and keyboard assembly.
18.Remove the one screw (M2x6) that secures the left fan to the palm-rest and keyboard assembly.
19.Remove the twelve screws (M2x4) that secure the system board to the palm-rest and keyboard assembly.
NOTE: Remove the two screws (M3x7.65, #2) from the M.2 2230 SSD slots on the system board. This step is applicable only
for the computers shipped with M.2 2230 solid-state drives.
20.After performing all the above steps, you are left with the system board.
21. Lift and turn the system board over.
22.Remove the heat-sink assembly.
23.Remove the audio board.
24.Remove the USB Type- C board.
Installing the system board
Prerequisites
If you are replacing a component, remove the existing component before performing the installation process.
About this task
The following image indicates the connectors on your system board.
58
Bekijk gratis de handleiding van Alienware m18 R1, stel vragen en lees de antwoorden op veelvoorkomende problemen, of gebruik onze assistent om sneller informatie in de handleiding te vinden of uitleg te krijgen over specifieke functies.
Productinformatie
| Merk | Alienware |
| Model | m18 R1 |
| Categorie | Laptop |
| Taal | Nederlands |
| Grootte | 41444 MB |
Caratteristiche Prodotto
| Kleur van het product | Zwart |
| Gewicht | 4230 g |
| Breedte | 410.3 mm |
| Diepte | 319.9 mm |
| AC-adapterfrequentie | 50 - 60 Hz |


