Akai ATT-11BTN handleiding
Handleiding
Je bekijkt pagina 7 van 76
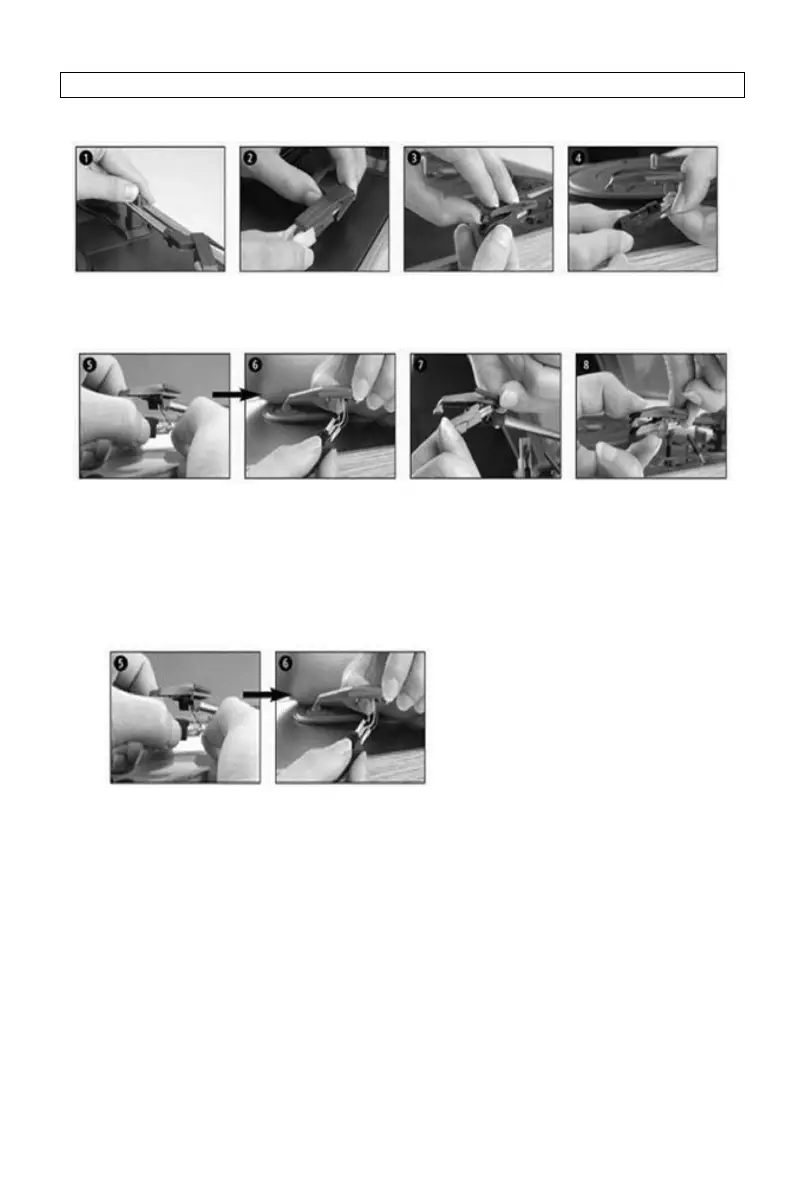
MAINTENANCE
REPLACING THE STYLUS
-Refer to the figures 1-8
Push the arm lock to
release the tone-
arm.
Take off cap of
cartridge to expose
the needle out.
Separate the
cartridge from the
socket lightly.
Take off the audio-line
from the cartridges
completely.
To fit a new one just in opposite deals, insert the audio-line accordingly, and install the cartridge to the
socket lightly.
Note: Please exercise extreme care whilst performing this operation so as to avoid the tone arm and
audio line wires from any damage.
INSTALLING A NEW STYLUS CARTRIDGE
-Refer to the figures 5 & 6
NOTES
We advise you to clean your records with an anti-static cloth to gain maximum enjoyment from them
and to make them last.
We would also point out that for the same reason your stylus should be replaced periodically
(approximately every 250 hours).
Dust the stylus from time to time using a very soft brush dipped in alcohol (brushing from back to front
of the cartridge).
WHEN TRANSPORTING YOUR RECORD PLAYER DO NOT FORGET TO:
• Replace the protective cap on the stylus.
• Put the rest clip into the pick-up arm.
7
Bekijk gratis de handleiding van Akai ATT-11BTN, stel vragen en lees de antwoorden op veelvoorkomende problemen, of gebruik onze assistent om sneller informatie in de handleiding te vinden of uitleg te krijgen over specifieke functies.
Productinformatie
| Merk | Akai |
| Model | ATT-11BTN |
| Categorie | Niet gecategoriseerd |
| Taal | Nederlands |
| Grootte | 16254 MB |


