Handleiding
Je bekijkt pagina 13 van 20
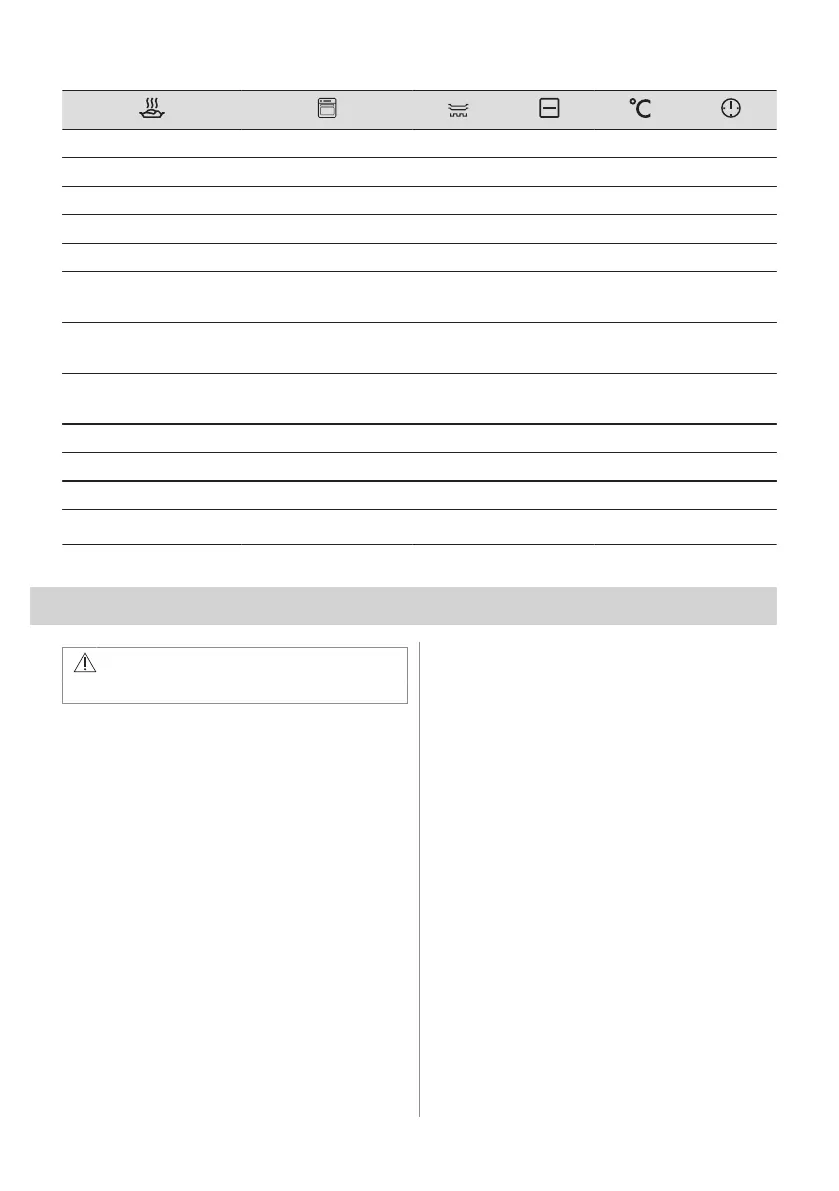
Small cakes, 20 per tray Conventional Cooking Baking tray 3 170 20 - 35
Small cakes, 20 per tray True Fan Cooking Baking tray 3 150 - 160 20 - 35
Small cakes, 20 per tray True Fan Cooking Baking tray 2 and 4 150 - 160 20 - 35
Apple pie, 2 tins Ø20 cm Conventional Cooking Wire shelf 2 180 70 - 90
Apple pie, 2 tins Ø20 cm True Fan Cooking Wire shelf 2 160 70 - 90
Fatless sponge cake, cake
mould Ø26 cm
1)
Conventional Cooking Wire shelf 2 170 40 - 50
Fatless sponge cake, cake
mould Ø26 cm
1)
True Fan Cooking Wire shelf 2 160 40 - 50
Fatless sponge cake, cake
mould Ø26 cm
1)
True Fan Cooking Wire shelf 2 and 4 160 40 - 60
Short bread True Fan Cooking Baking tray 3 140 - 150 20 - 40
Short bread True Fan Cooking Baking tray 2 and 4 140 - 150 25 - 45
Short bread Conventional Cooking Baking tray 3 140 - 150 25 - 45
Toast
1)
Grill Wire shelf 4 max. 1 - 5
1)
Preheat the appliance for 10 minutes.
11. CARE AND CLEANING
WARNING!
Refer to Safety chapters.
11.1 Notes on cleaning
Cleaning Agents
• Clean the front of the appliance only with a
microfibre cloth with warm water and a
mild detergent. Clean and check the door
gasket around the frame of the cavity.
• Use a cleaning solution to clean metal
surfaces.
• Clean stains with a mild detergent.
Everyday Use
• Clean the interior of the appliance after
each use. Fat accumulation or other
residue may cause fire.
• Moisture can condense in the appliance or
on the door glass panels. To decrease the
condensation, let the appliance work for
10 minutes before cooking. Do not store
food in the appliance for longer than 20
minutes. Dry the interior of the appliance
only with a microfibre cloth after each use.
Accessories
• Clean all accessories after each use and
let them dry. Use only a microfibre cloth
with warm water and a mild detergent. Do
not clean the accessories in a dishwasher.
• Do not clean the non-stick accessories
using abrasive cleaner or sharp-edged
objects.
11.2 Removing the shelf supports
Remove the shelf supports to clean the
appliance.
1. Turn off the appliance and wait until it is
cold.
2. Pull the front of the shelf support away
from the side wall.
3. Pull the rear end of the shelf support
away from the side wall and remove it.
ENGLISH 13
Bekijk gratis de handleiding van AEG OA5AB20SM, stel vragen en lees de antwoorden op veelvoorkomende problemen, of gebruik onze assistent om sneller informatie in de handleiding te vinden of uitleg te krijgen over specifieke functies.
Productinformatie
| Merk | AEG |
| Model | OA5AB20SM |
| Categorie | Oven |
| Taal | Nederlands |
| Grootte | 1761 MB |


