AEG LWR8516L6UD handleiding
Handleiding
Je bekijkt pagina 11 van 60
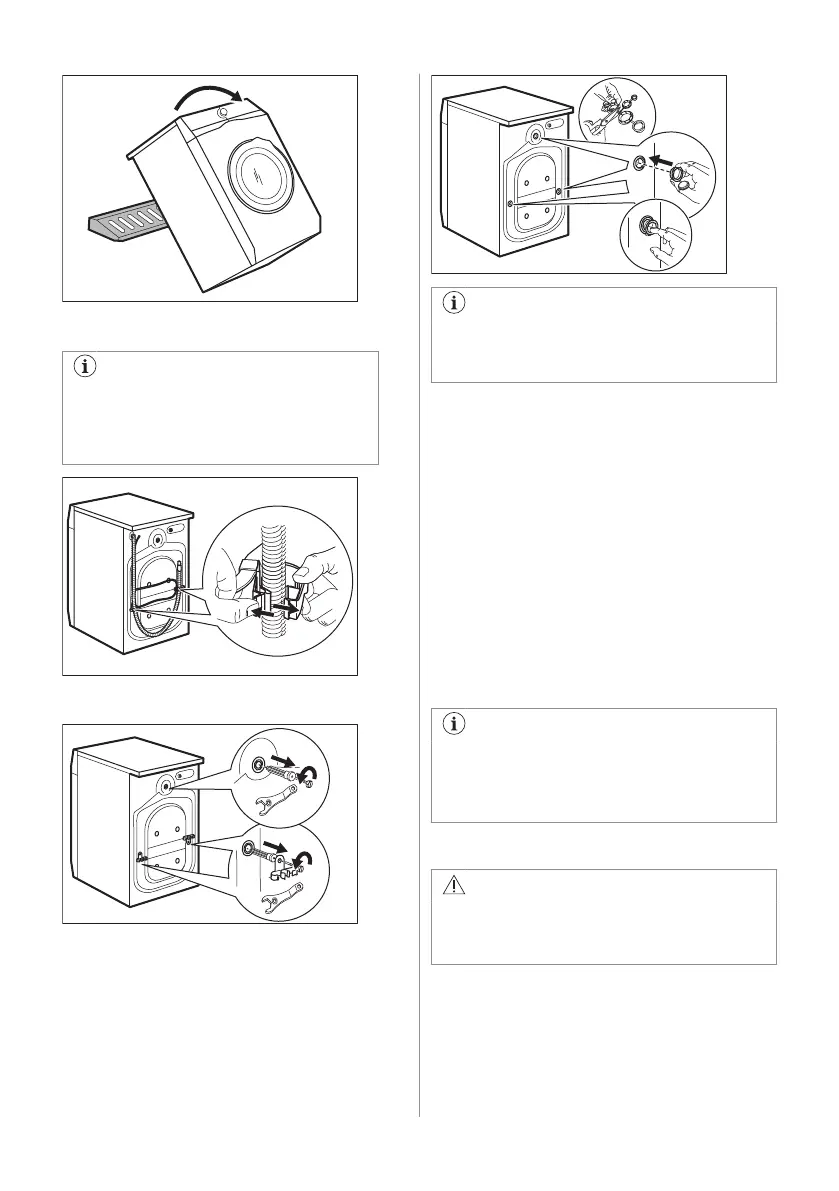
9. Remove the power supply cable and the
drain hose from the hose holders.
It is possible to see water flowing
from the drain hose. This is due to
the testing with water of the appliance
in factory.
10. Remove the three bolts by using the
spanner supplied with the appliance.
11. Pull out the plastic spacers.
12. Put the plastic caps, that you find in the
user manual bag, in the holes.
We recommend that you keep the
packaging and the transit bolts for any
movement of the appliance.
5.2 Installation on suspended
flooring
Suspended wooden floors are particularly
susceptible to vibration.
To limit vibration we recommend placing a
waterproof wooden panel, at least 15 mm
thick, under the appliance. It should be
screwed to at least 2 floor beams and should
extend beyond the front feet.
If possible, install the appliance where the
floor is more stable.
5.3 Positioning and levelling
1. Install the appliance on a flat hard floor.
Make sure that carpets do not stop the
air circulation below the appliance.
Make sure that the appliance does not
touch the wall or other units.
2. Loosen or tighten the feet to adjust the
level.
WARNING!
Do not put cardboard, wood or equivalent
materials below the appliance feet to
adjust the level.
ENGLISH 11
Bekijk gratis de handleiding van AEG LWR8516L6UD, stel vragen en lees de antwoorden op veelvoorkomende problemen, of gebruik onze assistent om sneller informatie in de handleiding te vinden of uitleg te krijgen over specifieke functies.
Productinformatie
| Merk | AEG |
| Model | LWR8516L6UD |
| Categorie | Wasmachine |
| Taal | Nederlands |
| Grootte | 5500 MB |


