Adj Pixie Driver 2000 handleiding
Handleiding
Je bekijkt pagina 9 van 26
9
INSTALLATION
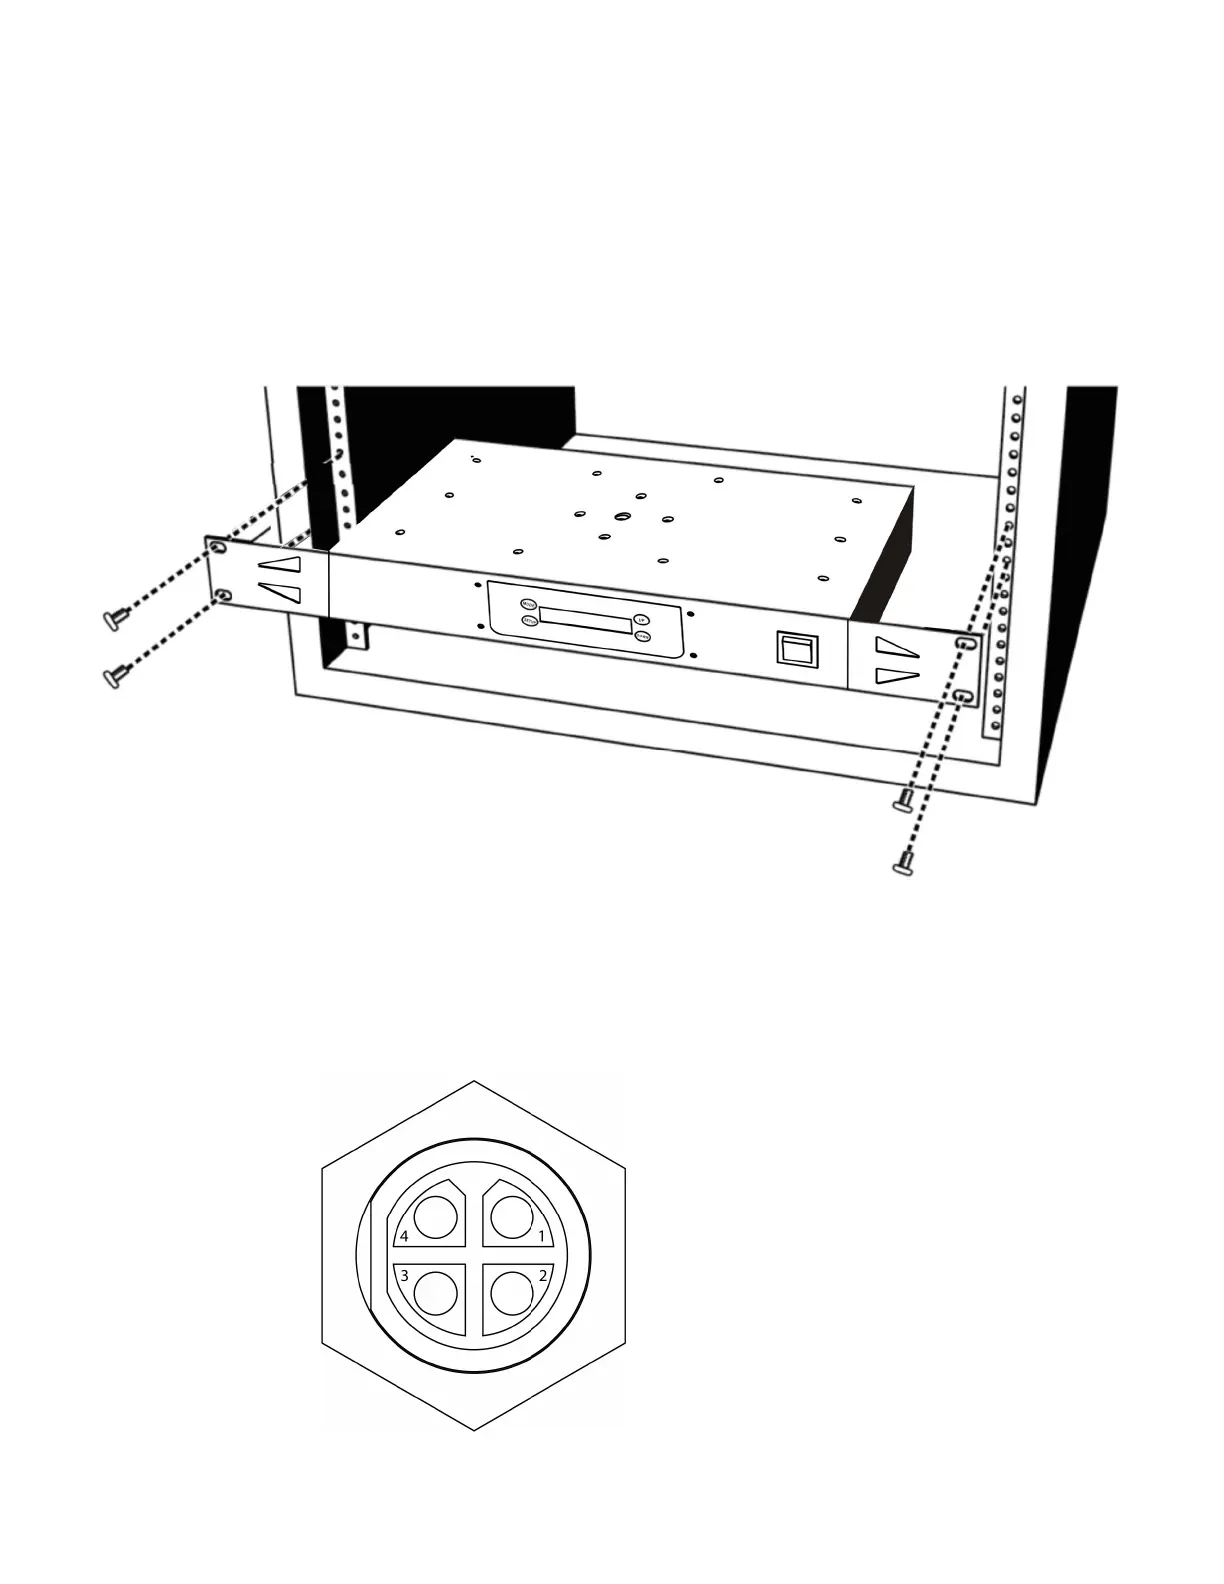
RACK MOUNTING
This device can be mounted in a standard 19-inch rack using the mounting brackets located on
each side of the device. Make sure to use mounting hardware that ts the mounting holes on the
device as well as the rack itself. Use all four (4) points on the mounting brackets to ensure that the
device is mounted securely. Please see the illustration above for reference.
OUTLET SOCKET PIN CONFIGURATION
This device features two (2) output sockets on the back side, which may be used to connect the
device to the desired lighting xtures. The pins for each output socket are congured as shown in
the image below. Please consult a qualied electrician for all electrical connections and/or
installations.
Pin 1: Power (+)
Pin 2: Data
Pin 3: CLK (clock pin)
Pin 4: Power (-)
Bekijk gratis de handleiding van Adj Pixie Driver 2000, stel vragen en lees de antwoorden op veelvoorkomende problemen, of gebruik onze assistent om sneller informatie in de handleiding te vinden of uitleg te krijgen over specifieke functies.
Productinformatie
| Merk | Adj |
| Model | Pixie Driver 2000 |
| Categorie | Niet gecategoriseerd |
| Taal | Nederlands |
| Grootte | 3129 MB |


